Ian Wallace Photographer and Photo Historian
Original Photography and Photographic History
Photographer and Author
Making Lens Caps for Large Format Lenses

If you want to use Victorian lenses with paper negatives, then there is a good chance you are going to need a cap for your lens and so you are likely to end up making a lens cap for your large format lens. Working with a slow lens and a slow negative emulsion requires exposures from half a second to many seconds. Traditionally, just like our Victorian predecessors, these exposures can be made by removing the lens quickly replacing the cap after the required amount of time. Although many lenses survive and are in good usable condition. Very few have their original lens cap.
I have now made several lens caps and thought it might be interesting to others if I documented the process I use. My objective, is to create a perfectly functional and reasonably authentic looking lens cap, without getting carried away. I started by examining one or two genuine lens caps from the Victorian period. These are generally finished in leather but are made in a similar way to that described below.
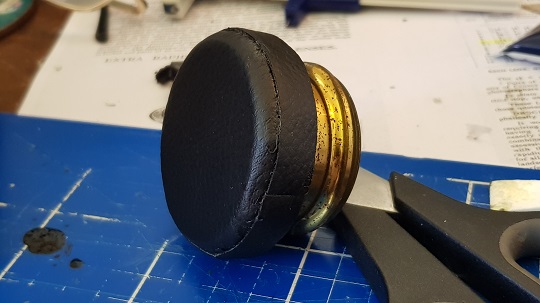
The caps I create have a cardboard internal structure a leatherette exterior a black velvet interior.
Getting Prepared
You will need these items if you would like to make your own lens caps:
- A piece of leatherette cloth. I use vinyl leatherette, but you could substitute real leather here if you wish. I bought a 30cm square from an online supplier.
- Some stiff cardboard. The sort of card that is used in packaging would be fine. Mounting card is probably a little too heavy. In the photographs below. I used piece of card from the back of a “Do Not Bend” envelope.
- Some black velvet. I bought a small square of good quality velvet from an online supplier.
- A tube of contact adhesive.
- Shoe scuff cover polish (liquid) to match leatherette colour.
- A pair of sharp scissors.
- A pencil.
- A Ruler.
- An inexpensive compass hole cutter. These can be bought online with spare blades for a few pounds and are a great investment.
- A small artist’s paint brush

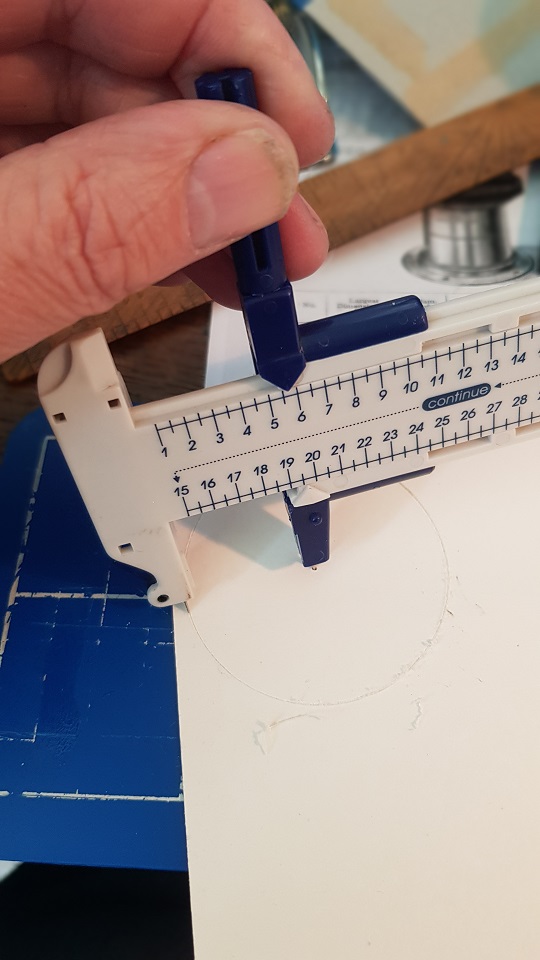
Step 1 – Measuring up
The first step is to measure the diameter of the front of the lens that the cap will fit over. If the lens has a hood, then of course we will be fitting to the hood and not the lens. This will give you the size we need to fit over. For example, 60 mm
Step 2 – Preparing the cap end
In this step I make two cardboard discs each slightly larger than the diameter of the lens. You may need a little trial and error at this point so be prepared to cut one or two practice discs until you are happy with the size you are creating. I usually try to cut about a mm larger all round (+2mm diameter) than the lens.
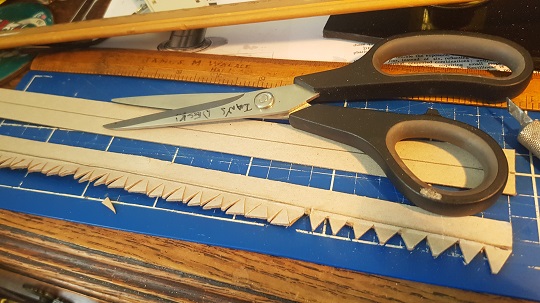
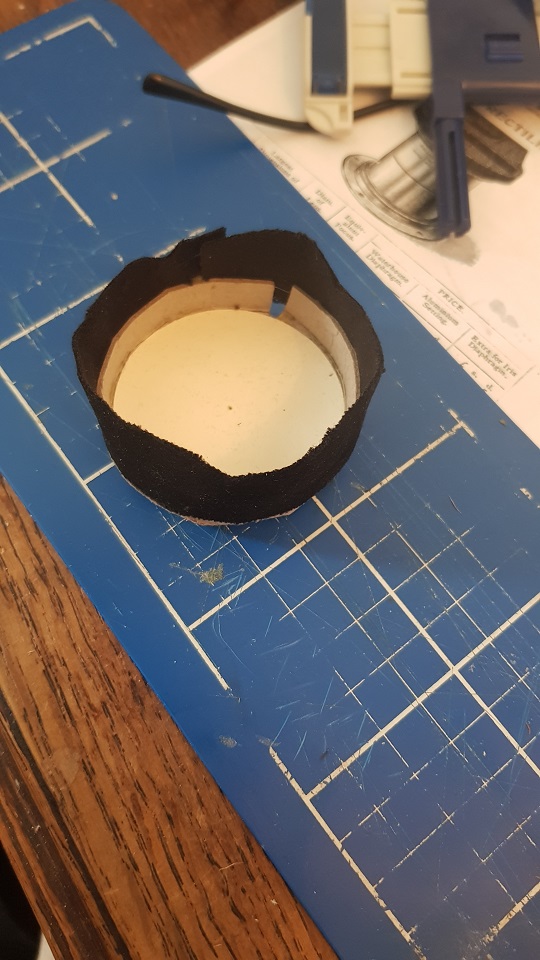
Step 3 – Creating the side wall
Decide how deep your sidewall needs to be for smaller lenses about 1cm is usually about right but measure your lens or lens hood. A big old lens might need 2cm. Add about the same again to this measurement. Cut a long strip of card this width (2x depth measured).
The strip needs to be longer than the circumference of the cap so you can roll one of you discs on its edge exactly one rotation along the card sheet to be sure that your strip is long enough.
You may want to mark a pencil centre line. Crease the strip down the middle lengthwise.
Now cut out small triangles along one side of the strip to make the gluing tabs. Do not cut over the centre line. These will make it easy to roll the strip and fold in the tabs without them creasing or overlapping. About 1 cm apart is usually Ok.
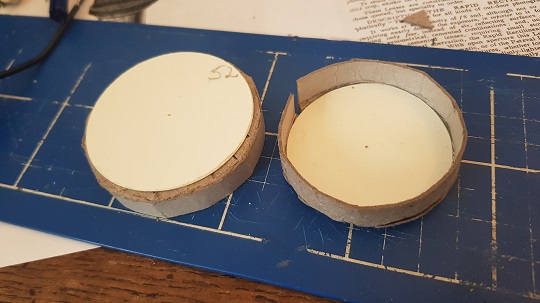
Step 4- Constructing the former
Soften and shape the strip of card by bending it so that you can glue the tabs down to the front of one of the discs. Rolling the strip around glue all the tabs and cut off the excess. A small gap is not a problem and may help give a little spring to the cap.
As you do this check the cap against the lens make sure it’s a nice loose but not excessively loose fit. This is the most critical step as too loose, and the cap will fall off too tight and you will not be able to achieve a smooth exposure with it. The excess diameter will be filled by the velvet so if the loose gap is much more than a millimetre you should adjust before the glue is fully set.
When you are happy with the basic shape. Take the second disc and glue it inside the cap covering all the tabs. This disc will give the cap surprising rigidity.
Set aside to dry.
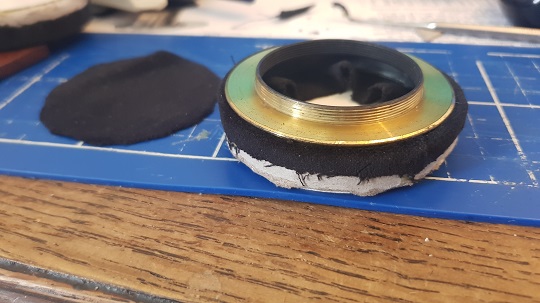
Step 5 – Add the liner
Cut a strip of velvet to with a length just over the circumference of the cap former you have made. (roll it along the velvet to check). The width of the strip needs to be about twice the height of the wall of the cap.
Fold the velvet inside the cap and check the fit on the lens. If there is any problem now is the time to correct it.
Put glue on the top half of the outside of the wall of the cap and glue the velvet in place. Trim the length to a perfect fit with no overlap. (this would later make an undesirable lump!) You have glued about a quarter of the width of the strip to the outside at this point.
Make some cuts (or little V’s ) in the loose edge of the velvet all along its length. Cut in about a quarter of the width of the strip.
Now glue the strip into the cap ensuring there are no folds in the velvet along the inner wall of the cap. Recheck the fit on the lens.
Cut a circle of velvet to fit inside the cap and glue this in place.
If there is a lens hood you can remove this from the lens and leave the cap on it to dry on it as a shaper. (you could use the lens as a shaper, but the glue will create a lot of fumes. Probably these are harmless to an uncoated lens, but I would not do it with a coated one.)
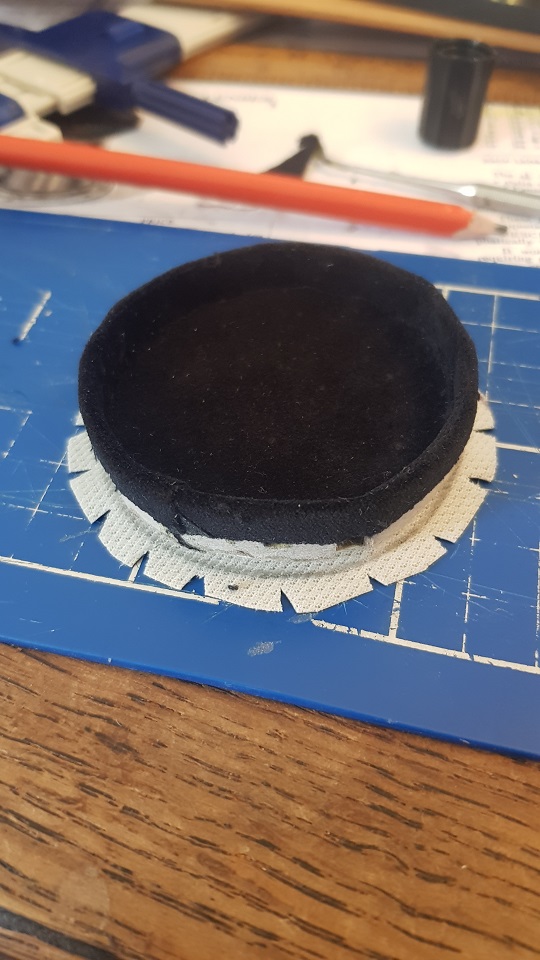
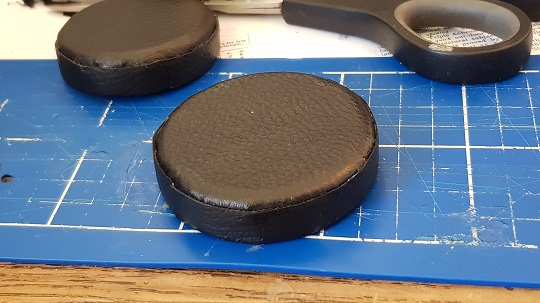
Step 6 – Covering the cap front
lace your cap on a piece of face down vinyl leatherette. Draw round it with a pencil. This will leave a circle a little larger than the card former.
Cut wide round the circle leaving an extra piece of leatherette half the height of the wall of the cap.
Now snip folding V’s into the edge of the disc. Do not cut as deep as the line. Cut a little short of it we do not really want the cuts to be visible when the cap is finished.
Put glue on the cap and stick on the back of the leatherette. Set aside to dry.
Fold down the excess leatherette and glue it to the cap wall. Make sure it does not overlap itself or the velvet as this will create an unsightly lump in the finished covering.
Step 7 – Final wall covering
Measure and mark with a ruler and cut out a strip of leatherette just over the length of the circumference of the cap. The width should be just a little less than the external wall height of the cap.
Dry fit to check the appearance. When you are happy glue in place. Set aside to dry.
If still need to tighten the cap a little at this point pulling up the little gap in the card as you fit the covering strip.
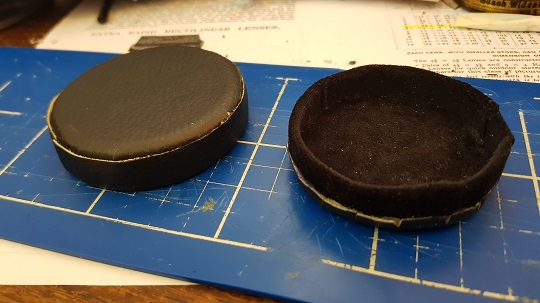
Step 8- Cosmetics
When the cap has dried there will be a few white edges showing. I just go over these with Black liquid scuff cover shoe polish using a small artists paint brush and then buff off the excess lightly. The white edges will darken down and disappear.
And that is it! Enjoy