Ian Wallace Photographer and Photo Historian
Original Photography and Photographic History
Photographer and Author
Wet Plate Collodion Portraiture

From the birth of photography in 1839, there were many attempts to improve on the basic processes that had been introduced by Louis Daguerre and Henry Fox Talbot. Just a little over a decade later, Frederick Scott Archer introduced the wet plate collodion portraiture process. The wet plate process would be the process used most extensively by photographers in the following half-century. Although the process was still quite complex, it offered a speed and quality of photography that drove its adoption.
The wet collodion process can be used to create a negative from which many prints can be made. However, it was also often used as the Victorian Polaroid. By making the exposure directly onto blackened tin or by putting a black surface such as silk behind a glass plate (an Ambryotype) an instant highly detailed positive image is created.

These different forms of wet plate photography enabled professional Victorian photographers to offer likenesses to suit the pocket of many different customers.
Learning the process
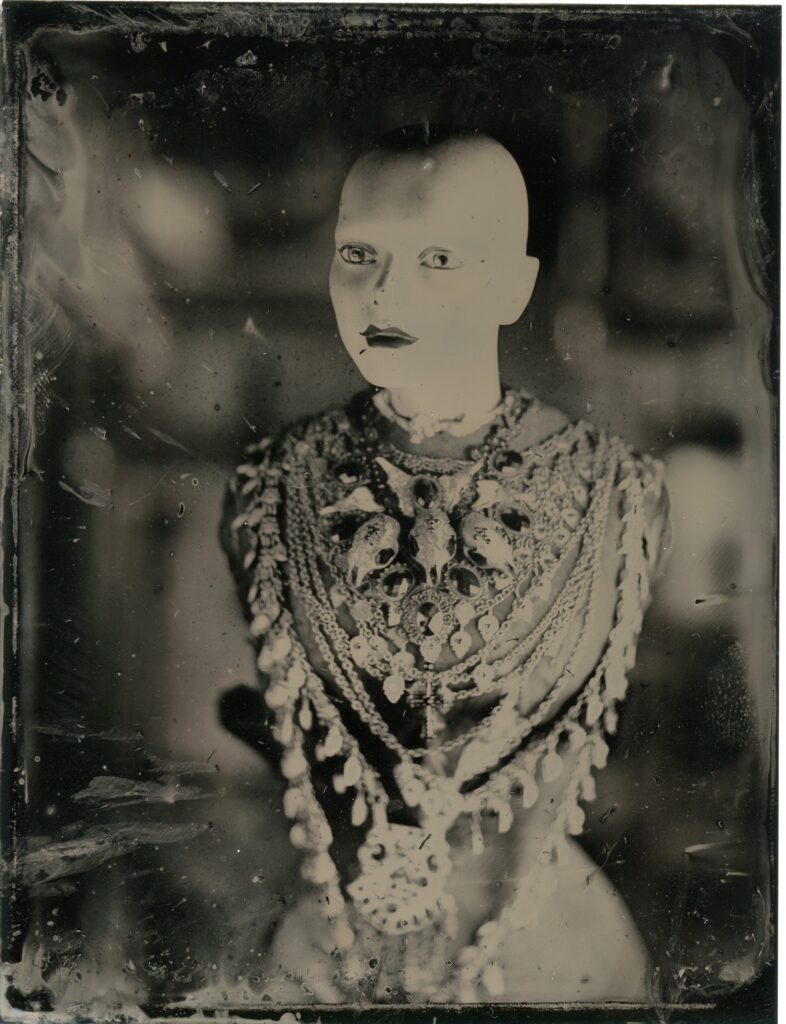
I have long wanted to be able to recreate the wet plate collodion portraiture experience and recently was able to attend a class and learn the process from master. Shown here are two of my “firsts”. The highly adorned studio dummy is a tintype image made, not on tin, but on a black aluminium plate. This was one of the first images I was able to make using the multi-step collodion process. The wet plate practitioner must become something of an Artisan.
The second image is an Ambrotype (above) and is the first wet plate photograph that I have been able to take with my own camera. The f5.6 lens used is perhaps more suited to faster dry plate photography. However, Dave did an amazing job of sitting still for 25 seconds for this studio portrait. This is why I anticipate that a faster Petzval portrait lens, as was often used by Victorian photographers, will be more suited to the process
The wet plate process is highly tactile and right from the beginning demands your full attention at every stage. The process begins by pouring the collodion onto the new plate, a nerve wracking task which at any moment can lead to the collodion pouring off all over the place! It ends, with the captivating reveal which you may have seen in videos as the plate clears before your eyes in the fixer. Not only are the images distinctive, the process is absorbing and exciting to use.
Getting kitted out for wet plate collodion portraiture
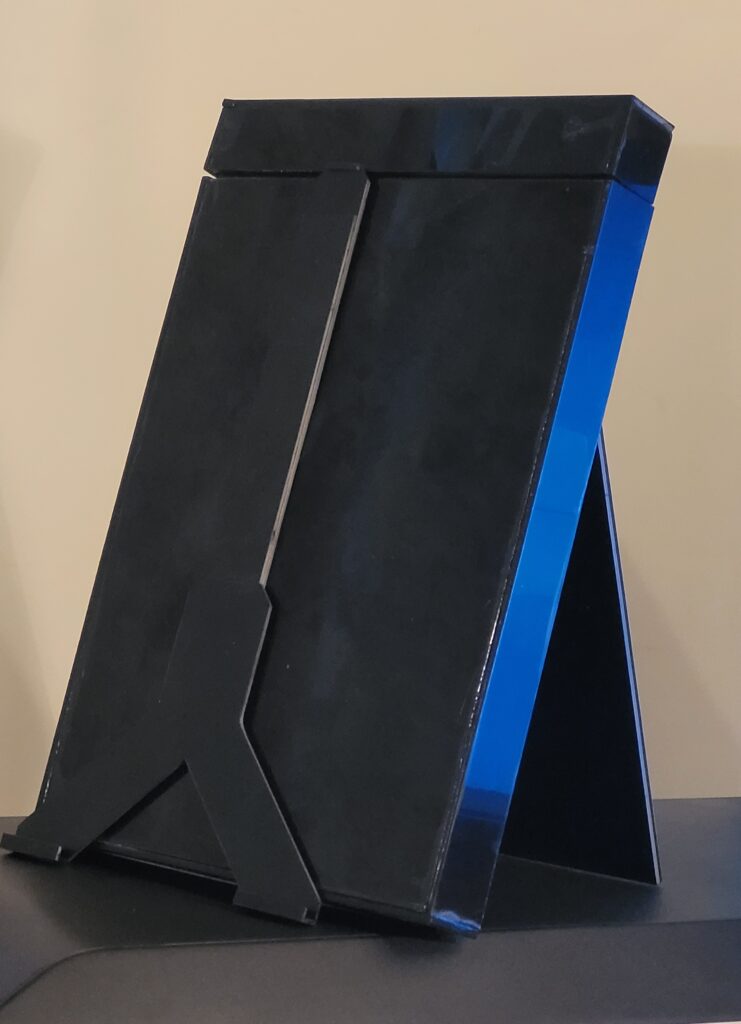
Now that I have the knowledge, I need the tools and the chemicals. I want in the future to be able to offer a wet plate collodion portrait experience. I would like people to be able to come to my studio to be photographed by me and to leave with their whole plate image. To do this, in fact, take any more wet plate images. I need to accumulate a lot of chemicals and a several more specialist items like a silver nitrate dip tank.
Some of items needed for wet plate photography are quite expensive to purchase and so I decided I could make dip tank. Using my favourite construction material (polystyrene sheet), I carefully built the relatively simple form of the silver nitrate tank with the rest, and a light tight lid. I’m not concerned that it doesn’t have a pretty wooden case, just that the capacity for the liquid (~750mls) is no more that it needs be as the price of silver nitrate has recently shot up.
Watch out on my Instagram feed, soon hopefully, I will have some distinctive collodion portraits to share.
If you would like to be photographed in this unique way. Please get in contact.