Ian Wallace Photographer and Photo Historian
Original Photography and Photographic History
Photographer and Author
Building a UV Printing Box

When I tried to make my first print using an alternative photographic process, it was just a few days from the shortest day of the year and the natural light available was at its minimum. I eagerly set out my contact frame only to find that at the end of the whole day, I had just the palest of images. Six days later. In desperation, I removed the picture from my printing frame. I now had an image, but it was still very pale. It was immediately clear to me, I was going to need UV printing box.
Research
If you hunt around on the Internet. There are several good examples of how you can do this using modern LED light strips. This was the approach I took, and as it may give someone else a few ideas when they need to build one. I thought I’d write up how I created my box in this post. The UV box reduced the more than six days required for exposure with winter light to just a few hours. Still quite a long time, but quite workable.
Design and Getting Started
My first task was to establish my basic design and as I’ve mentioned, online, you can find videos about the creation of several different boxes. Having watched these, I drew a few ideas together and hatched my plan. LED light strips, in a silver foil lined box, with a dimmer.
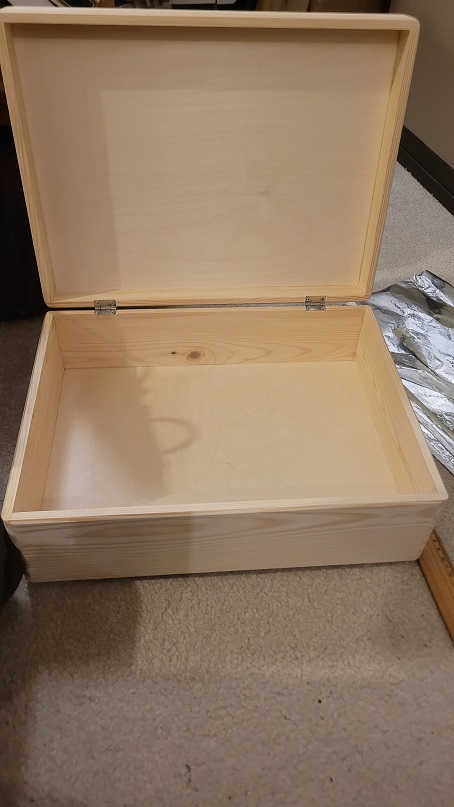
As with everything, cost was a consideration, and although some other designs used two 5 m LED strips, I decided to start with and leave room for a second, if necessary. After looking for the type of boxes that I had seen others using, I decided just to find something that would suit the size of picture I want to print and would do a tidy job at a reasonable cost. I settled on a readily available (eBay) wooden box advertised for Decoupage and other craft uses. I chose the version without handles as I didn’t really want to let any UV light out. The box measures 30 cm x 40 cm and is about 14 cm deep.
Fortunately, I already had a good 12 V DC power supply unit. You need to be careful selecting power supplies as the LEDs draw a reasonable amount of current. If two 5 m strips are used . You may find you may need two power supplies as it is inadvisable to have very long runs of LEDs. Creating a box that just suited the size of prints I want to make, helped to ensure the intensity of one, 5 m length of LEDs would be sufficient.
Lining the box
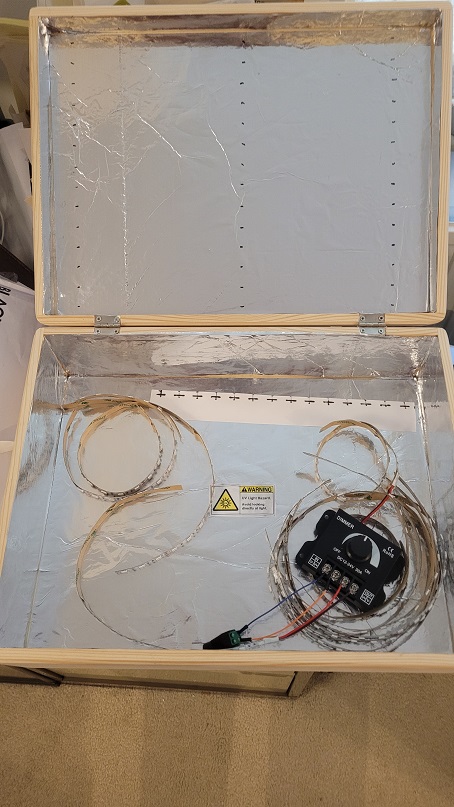
I decided to adopt the idea of using silver foil to line the box as it seemed to me that anything that would help more of the light be absorbed into my print, rather than the box was a good idea. I carefully measured and cut out lining pieces from a roll of kitchen baking foil and then used spray mount on the inside of the box to fix each of the pieces in place. Temporarily I removed the check strap from the lid which was put back later.
Once the box was lined, I carefully marked out in the lid the position of the 14 pieces of my 5 m 5050 LED strip. The strip was quite easy to cut up. But this must be done at the predetermined cutting points so the actual length of the strips is a compromise between the size of the box and the places where the LED strip can be cut. In the case of my box, it worked out quite neatly. I planned to use only one 5 m length of LEDs, but I also wanted control over the brightness so I purchased a small 12 volt dimmer , which I mounted on the end of the box.
Wiring the LED chain
I could see after a couple of minutes of planning the wiring of the LED chain I could quickly end up with something complicated and tangled. Although others have demonstrated that the strips can be soldered together, which doesn’t look that difficult, by the time you have cut your 5 m into 14 pieces. There are two wires to prepare and solder for each of about 26 ends. I decided it was simpler, just to buy the very inexpensive connector strips which are available.
The biggest constraint with these is their length which could easily become a problem of loose wiring if you just chain one strip to another in the most obvious fashion. After drawing out potential connection patterns quite a few times, I decided there was a benefit to bringing the power in in parallel several times from a connector block rather than trying to create one long single chain of LEDs. The end result is, I think quite tidy.
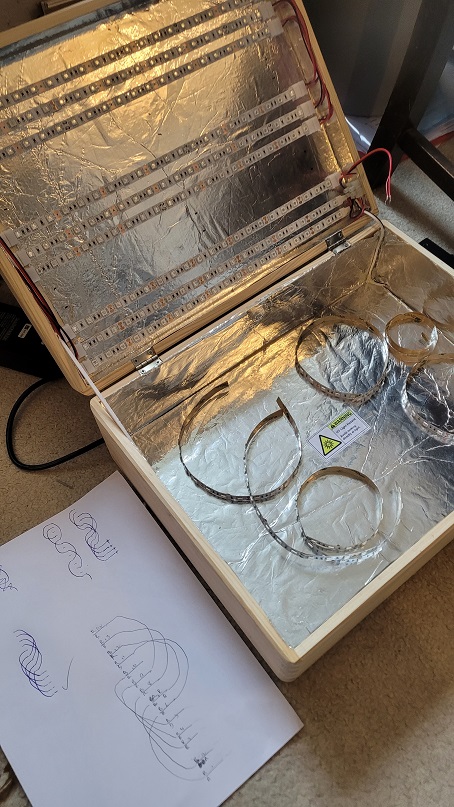
I tested each strip of LEDs as it was installed. I made use of a hot glue gun to affix the head of each connection wire to the box lid. The LEDs are self adhesive.
Test, Test, Test
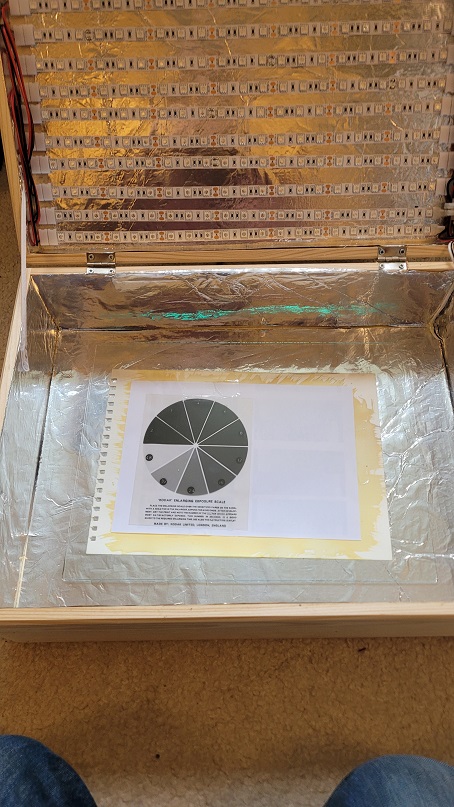
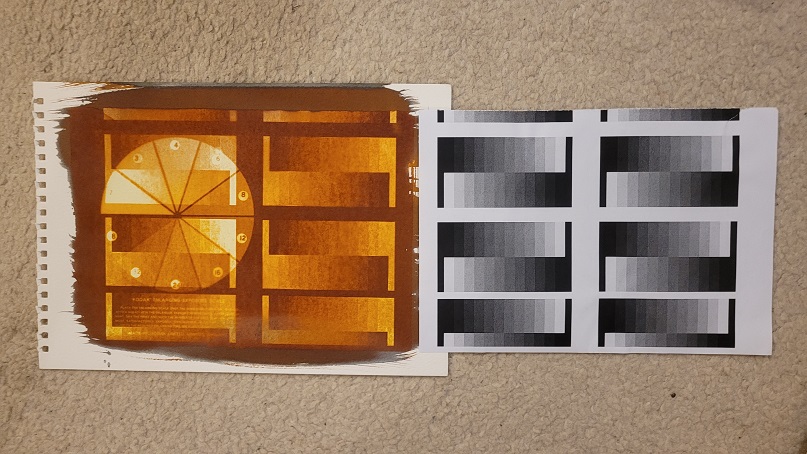
Finally, I was ready for my first test. I used a combination of test card sheet and a darkroom printing wheel. The idea was really just give me some feel for how long exposures would need to be in the box. In practice, while this was a very good learning exercise. I discovered that the laser printed test negative allowed transfer of the UV light to my Van Dyke paper much more efficiently than the Ilford multigrade negatives I’m planning to use in the box. Many people make digital negatives printed onto overhead projector slide material or similar. In this box they would, I’m think, print in a matter of minutes rather than hours.
Parts List
As Its been requested a few times this was my parts list. Most items can be found on eBay.
- UV Ultra Violet 300 LED Strip Light 5050 SMD DC 12V 5M 60 LED/meter IP30 (395-405nm)
- 40 x 30 x 14 cm Rectangular Decorative Pinewood Keepsake Memory Storage Box
- 2Pin LED Strip Pre-Wired Clip Connector (x 12 might vary depending on your wiring pattern)
- A Chocolate strip electrical connector block (2 connections)
- A DC 12-24V 30Amp Dimmer switch
- A 12V Female power PSU connector
- A small length of bell-wire
- A can of Spray mount glue (and a tube of contact adhesive for patching)
- A roll of baking foil
- A 12VDC PSU (I used a 10Watt PSU but 5W should be sufficient)
- Solder
- Some scrap paper for planning on an making temporary rulers that fit in the box lid.
In use, your box will also need a suitable size sheet of glass to place over your print to keep it down on the printing paper. I use one from an old picture frame, but you could have one cut and get the edges made safer.
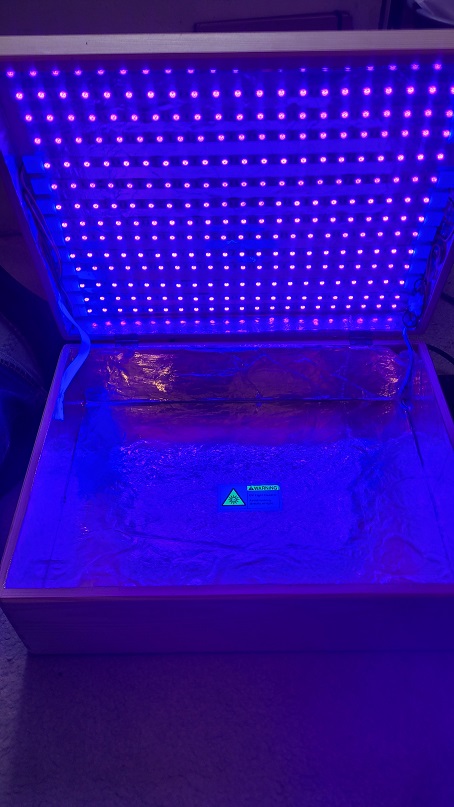
WARNING UV light is hazardous. Avoid looking directly at the LEDs and minimise you personal exposure to the UV light. I added a little hazard sticker in my box just as a reminder to keep safe!
Since this box is only cooled by heat radiating from its surface it can get quite warm, it should not be left unattended for long periods. Ideas for enhancements might include a small computer cooling fan and a countdown timer to ensure it always shuts down if left on.
Tools
- A craft knife
- Steel Ruler
- Soldering Iron
- Small Pliers (and/or wire strippers)
- Small electrical scredriver
- Staple gun
- Hot Glue Gun
- A Hand Drill and 3/16 bit